Most commonly changed BIOS settings can make or break your new PC build. If you just finished putting together your first custom gaming PC and something feels off, the BIOS is likely where the fix lives. This guide walks you through every key setting you need to know.
What Is the BIOS and Why Does It Matter for Custom Builds?
The BIOS, which stands for Basic Input/Output System, is the first software your PC runs when you power it on. Think of it as the control center that sits between your hardware and your operating system. Without it, your computer would not know where to look for Windows, how fast to run your RAM, or even that you plugged in a second hard drive.
Modern motherboards actually use a newer version called UEFI, which stands for Unified Extensible Firmware Interface. Most people still call it the BIOS, and that is perfectly fine. The important thing to understand is that UEFI gives you a more visual, mouse-friendly interface compared to the old text-only BIOS screens of the past.
When you build a custom PC, especially a gaming rig, understanding the most commonly changed BIOS settings is key because the BIOS does not automatically know what components you installed. You often have to go in and tell it. That is exactly what this guide covers.
How to Get Into the BIOS on Your New Build
Before you can change any settings, you need to know how to access the BIOS. As soon as you power on your PC, press the key shown on your screen to enter setup. The key varies by motherboard brand, but it is usually one of these:
- Delete (most common for gaming motherboards like ASUS, MSI, Gigabyte)
- F2 (common on ASUS and some ASRock boards)
- F10 (HP systems)
- F1 or F12 (some Lenovo and other brands)
Press the key quickly and repeatedly right after powering on. If Windows starts loading, you missed it and will need to restart. Once you are inside, take a moment to look around before changing anything.
Most Commonly Changed BIOS Settings for RAM
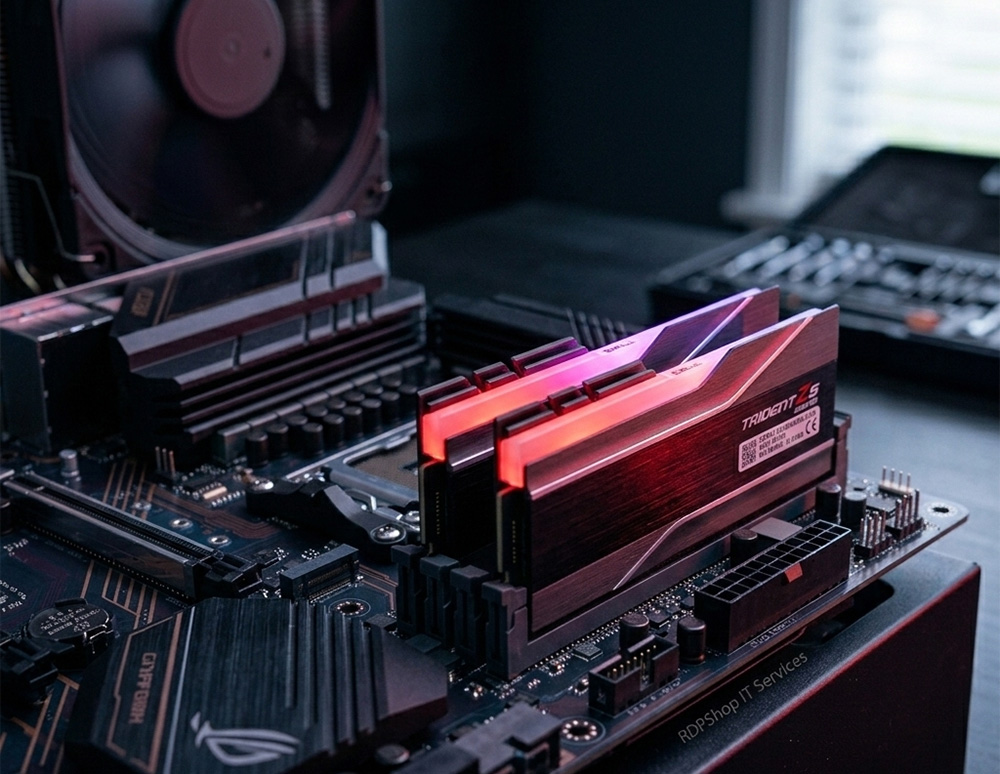
One of the most commonly changed BIOS settings after a new build involves your RAM. By default, most motherboards run your memory at a conservative base speed, usually 2133 MHz or 2400 MHz, even if you bought faster DDR4 or DDR5 sticks rated for 3200 MHz, 3600 MHz, or beyond.
Enabling XMP or EXPO Profiles
XMP stands for Extreme Memory Profile. EXPO is AMD’s version of the same idea. These are pre-set profiles built into your RAM that tell the motherboard the exact speed and timings the manufacturer tested and rated those sticks for.
To get the speed you paid for, you need to enable XMP or EXPO manually. Here is how to do it:
- Enter your BIOS.
- Look for a section called AI Overclocking, D.O.C.P., or simply XMP/EXPO depending on your board.
- Select the profile listed (usually Profile 1).
- Save and exit.
After you reboot, your RAM will run at its rated speed. This one change alone can noticeably improve gaming performance, especially in CPU-bound games.
Checking RAM Slot Population
If your system shows less RAM than you installed, check that your sticks are seated in the correct slots. Most dual-channel motherboards want you to use slots A2 and B2, not A1 and B1. Your motherboard manual will confirm the right slots.
If the BIOS still does not show the correct amount, reseat the RAM and check again. Sometimes a stick is not fully clicked in.
Storage Settings You Should Check Right Away
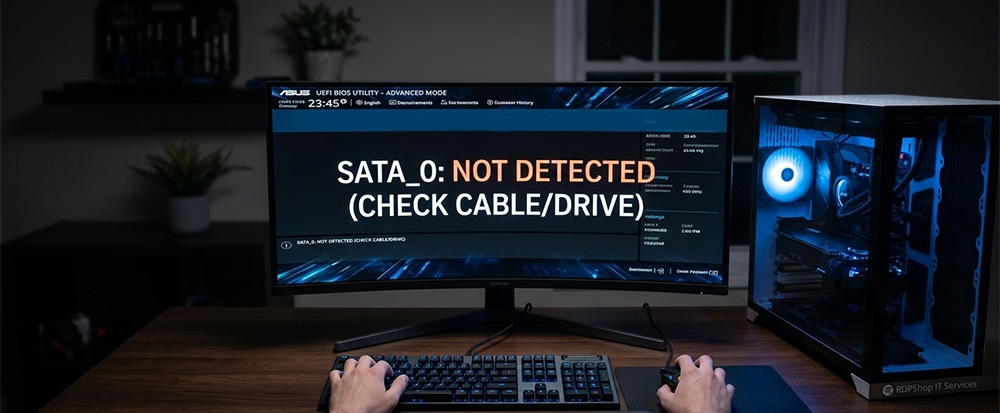
Storage is another area where the most commonly changed BIOS settings come into play. If your hard drive or SSD does not show up in Windows, adjusting the most commonly changed BIOS settings for storage is usually where the fix starts.
Setting the SATA Mode to AHCI
If you are using a SATA SSD or a traditional hard drive, make sure the SATA controller mode is set to AHCI and not IDE. AHCI enables faster data transfer speeds and features like hot-swapping. IDE mode is outdated and can limit your drive’s performance.
To change this, look for SATA Configuration or Storage Configuration in your BIOS and switch the mode to AHCI. Do this before you install Windows, because changing it after the fact can cause boot errors without extra steps.
Enabling NVMe Drives in the BIOS
If you installed an M.2 NVMe SSD, some motherboards require you to enable the M.2 slot in the BIOS before it shows up. Look under your storage or advanced settings for an option labeled M.2 or PCIe storage. Make sure it is enabled and set to the correct protocol, which is usually NVMe for modern SSDs.
Setting the Boot Drive Priority
After installing Windows, your PC needs to know which drive to boot from. Go to the Boot section of your BIOS and place your SSD or the drive containing Windows at the top of the boot order. Without this, your PC might try to boot from the wrong drive and show an error screen.
If your Windows installation keeps restarting during setup, the BIOS may not be detecting your drive at all. I cover this in detail in my post about Windows Install Keeps Restarting, which walks through exactly how to fix that problem.
BIOS Settings for New PC Builds That Involve Your CPU
CPU settings are among the most commonly changed BIOS settings that first-time builders overlook, but they matter more than most people realize. Even if you are not overclocking, a few settings can affect stability and performance.
Verifying CPU Core Count and Speed
Once you boot into the BIOS, check that your CPU is recognized correctly. The main screen should show your processor model, its base clock speed, and the number of cores. If any of these look wrong, your CPU may not be seated properly or one of the pins could be damaged.
For AMD CPUs, pay attention to whether Precision Boost is enabled. This feature automatically boosts your CPU speed when workloads demand it, and it is usually on by default. Just confirm it has not been turned off.
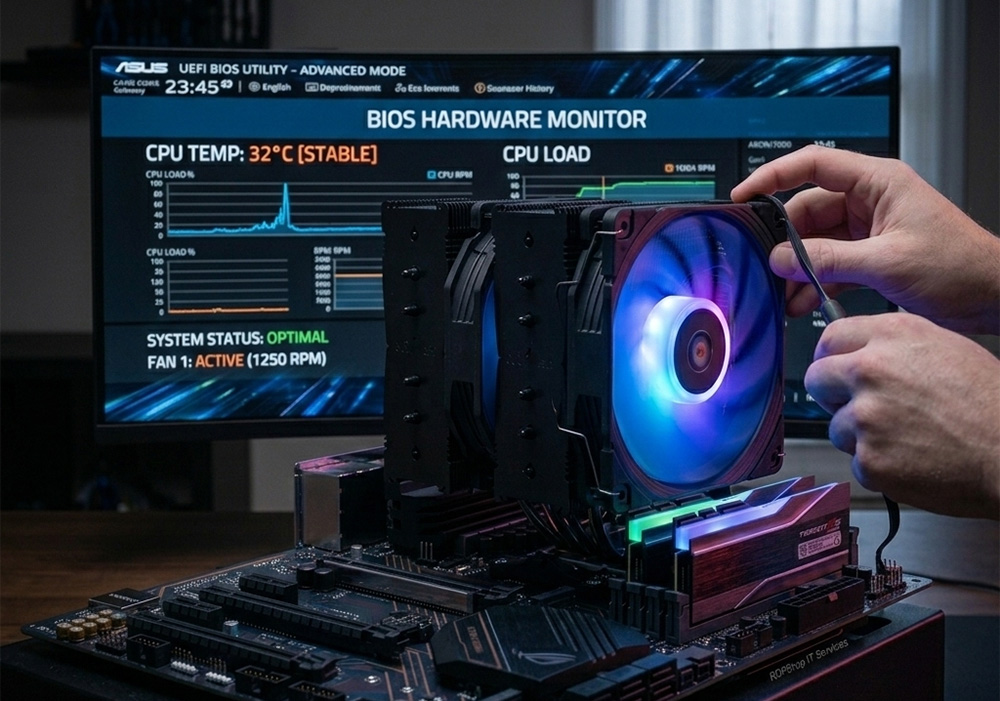
Adjusting CPU Fan Settings and Thermal Monitoring
Custom CPU coolers, whether air towers or all-in-one liquid coolers, often need fan speed adjustments in the BIOS. By default, motherboards use a generic fan curve that may run your cooler fans louder than necessary or not ramp them up fast enough under heavy load.
Look for a section called Fan Control, Smart Fan, or Q-Fan Control depending on your board. From here you can set temperature targets and fan response curves. I recommend setting a profile that keeps the CPU below 80 degrees Celsius under full load while staying reasonably quiet at idle.
If your system posts a CPU fan error on boot even though the fan is running, check that the cooler fan is plugged into the correct header. The CPU cooler should connect to the CPU_FAN header, not a chassis fan header. Some boards will not boot if the CPU_FAN header detects no signal.
GPU and PCIe Settings for Gaming Builds
Your graphics card is the heart of a gaming PC build, and GPU options rank among the most commonly changed BIOS settings that affect how it performs and behaves.
Setting the Primary Display Output
When you first boot a new build with a dedicated GPU, the monitor needs to be plugged into the graphics card, not the motherboard. However, the BIOS might still be set to use the integrated graphics as the primary display. If you get no signal on boot, this could be why.
Go into your BIOS and look for a setting called Primary Display, Display Output, or Initial Display Output. Set it to PCIe or your GPU slot. After saving and rebooting, your monitor output should come through the graphics card correctly.
Enabling Resizable BAR for Better Gaming Performance
Resizable BAR, also known as Smart Access Memory on AMD systems, is a feature that allows your CPU to access the full GPU video memory at once instead of in small chunks. Most modern Intel and AMD CPUs and GPUs support this, and enabling it can improve frame rates in some games.
To turn it on, you typically need to enable both CSM Disabled (running in UEFI mode) and Above 4G Decoding in the BIOS. Then look for a Resizable BAR option and enable it. Check your GPU manufacturer’s site to confirm your card supports it before making changes.
PCIe Generation Settings
Your BIOS may let you choose between PCIe 3.0, 4.0, or 5.0 for your primary graphics slot. Newer GPUs benefit from PCIe 4.0. If you notice your GPU is not running at full bandwidth, check this setting and match it to what your GPU and CPU support.
Secure Boot and TPM Settings for Windows 11
If you are installing Windows 11, two of the most commonly changed BIOS settings are non-negotiable.
Enabling Secure Boot
Secure Boot is usually found under the Security or Boot tab in your BIOS. It prevents unauthorized software from loading during startup and is required by Windows 11. Set it to Enabled.
Some boards also ask you to set Secure Boot Mode to Standard. If you installed any custom boot software or Linux alongside Windows, note that Secure Boot may interfere. For a clean gaming Windows 11 build, just leave it on Standard.
Enabling TPM 2.0
TPM stands for Trusted Platform Module. On Intel systems, this is often labeled Intel PTT. On AMD systems, it is called fTPM or AMD CPU fTPM. Either way, look in your BIOS security settings and enable it.
After enabling TPM 2.0 and Secure Boot, Windows 11 installation will proceed without issues. These are among the most commonly changed BIOS settings for anyone doing a fresh Windows 11 install on a new build.
BIOS Settings for New PC Builds — Power and Performance Options
A few power-related settings are worth reviewing, especially for a gaming PC where you want consistent, maximum performance.
Setting Performance Mode or Power Plan
Some gaming motherboards offer a built-in performance preset or power delivery mode in the BIOS. Look for options like Performance Mode, Gaming Mode, or power limit settings under your CPU or platform power settings. Enabling a performance preset can allow your CPU to sustain boost clocks for longer during demanding games.
Fast Boot and Its Trade-Offs
Fast Boot is a BIOS feature that skips some startup checks to get you into Windows faster. It is convenient, but it can occasionally make it harder to get back into your BIOS if something goes wrong. If you are still setting up your system or troubleshooting, consider leaving Fast Boot disabled until everything is stable. You can always turn it on later once your build is fully configured.
Virtualization Settings
If you plan to run virtual machines, Docker, or Android emulators on your gaming PC, you need to enable virtualization in the BIOS. On Intel systems, look for Intel VT-x or Intel Virtualization Technology. On AMD systems, look for SVM Mode or AMD-V. These are disabled by default on many boards and will prevent virtualization software from working if left off.
Saving Your Settings and Verifying Everything Works
Once you finish working through the most commonly changed BIOS settings, always use the Save and Exit option rather than just closing out of the BIOS. Most boards let you press F10 to save and exit quickly. The system will reboot and apply your new settings.
After rebooting into Windows, take a moment to verify your changes worked. Open Task Manager and check that your RAM is running at the correct speed. Use a free tool like CPU-Z or HWiNFO64 to confirm your CPU speed, RAM timings, and GPU detection all look correct.
If something does not seem right after a BIOS change, reboot back into the BIOS and double-check your settings. Most motherboards also have a Load Optimized Defaults option that resets everything to a clean state if needed. This is a useful safety net when troubleshooting a new build.
Need Repair? Let’s Get It Fixed Today
Ready to Fix Your Computer Problem? Schedule Service Today!!