Windows install keeps restarting? You’re not alone. Many users face this frustrating loop where the setup process copies files, reboots, and starts over endlessly. This guide explains why it happens and shows you how to fix it step by step so you can complete your fresh Windows installation.
Why Windows Install Keeps Restarting During Setup
You start the process with high hopes. The Windows installer loads from your USB drive. It copies files smoothly and even shows a partitioning screen where you select your drive. Then it asks you to restart. But instead of continuing the install, your PC boots right back to the same setup screen. This cycle repeats over and over, thus windows install keeps restarting.
First, understand the core problem. Windows setup has multiple phases. Phase one runs entirely from the USB or RAM. It extracts files and prepares the system. Phase two needs a real storage drive like an HDD or SSD to write the operating system files permanently. If that drive is missing or undetected, setup restarts to retry phase one endlessly. No error message appears because the early checks pass.
Next, consider common triggers. Faulty USB media corrupts the process early. Hardware conflicts interrupt file copying. But most often, the storage drive fails to register properly. Users overlook this because the partitioning screen tricks them into thinking everything works fine.
The USB Drive Confusion Explained
A major source of confusion hits during the drive selection screen. You see a drive listed. You partition it without issues. Yet windows install keeps restarting after reboot. What gives?
The installer detects the USB itself as a temporary drive in early stages. Windows mounts the USB’s storage space to stage initial files. This lets you “partition” what appears as available space. You think you selected your hard drive. In reality, setup used the USB for prep work.
Does this wipe your USB clean? No. Setup accesses the USB in read-only mode for its core files. It stages data in a small temporary area or RAM. The partitioning you perform creates virtual partitions that exist only during that session. Your USB installer files stay intact. Once reboot happens, setup scans for a persistent drive to complete the install. None found? Back to square one.
This behavior explains why no obvious error shows up. It also highlights why checking BIOS detection solves most cases. We cover that deeper later. For now, know this USB quirk misleads thousands of users yearly.
Common Causes Beyond USB Staging
Multiple factors cause a Windows install to keep restarting. Let’s break them down by priority.
First and foremost:
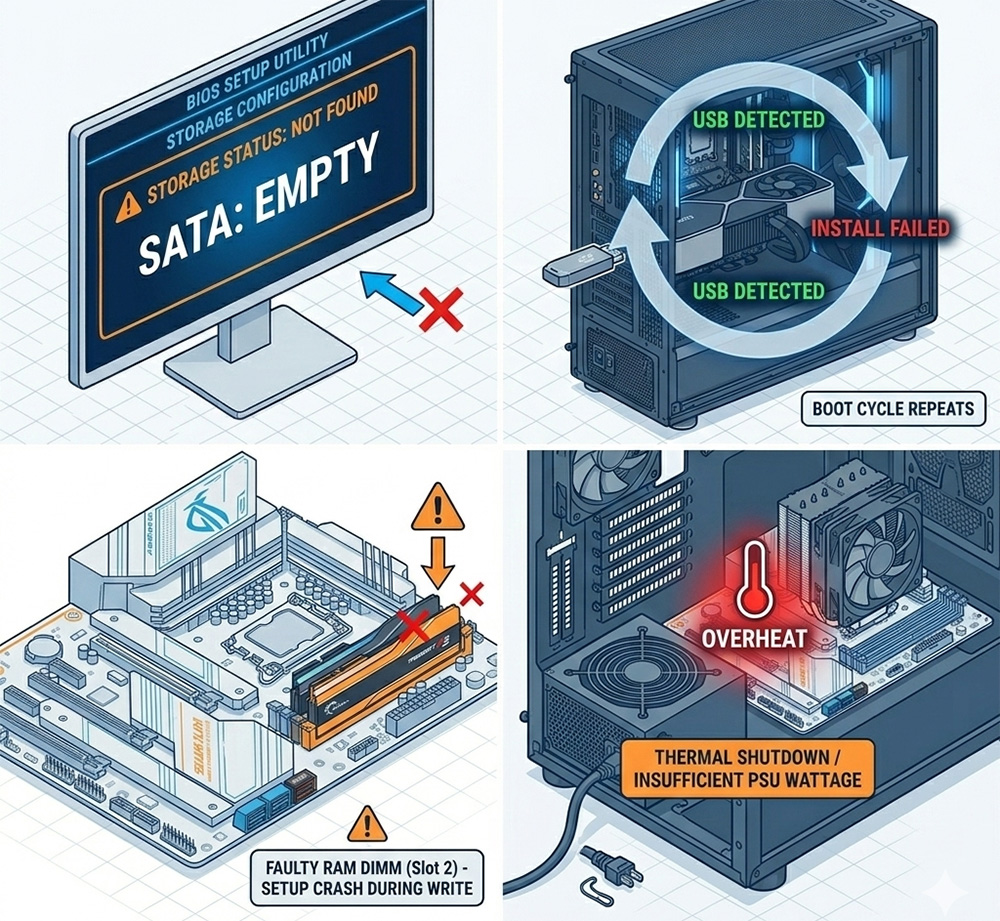
Hard Drive Detection Failure. This is the leading silent killer. If your BIOS does not “see” the physical drive, Windows will still let you proceed with temporary staging (as explained in the USB section), but once the computer reboots to finish the job, it finds no destination. Without a detected drive to boot from, the system simply cycles back to the USB installer.
Second, corrupted installation media:
Download glitches or bad USB writing tools create faulty ISOs. Windows starts extraction but hits bad sectors. Instead of erroring out, it reboots to recover.
Third, RAM instability:
Faulty memory sticks crash during heavy file operations. Single-channel RAM or mismatched modules exacerbate this. Setup copies gigabytes of data; one bad DIMM forces a restart loop.
Fourth, power supply or thermal issues:
Insufficient wattage or loose cables cut power mid-process. Overheating triggers thermal shutdowns that mimic software loops.
Fifth, BIOS misconfigurations:
Wrong SATA modes (like RAID instead of AHCI) prevent proper drive communication. Secure Boot may reject the media, or Fast Boot might skip the handoff required to recognize the new boot partition.
Sixth, hardware conflicts:
Extra peripherals can draw power or interrupt the install sequence. Having multiple drives connected can also confuse the boot order, sending you back to the beginning.
Finally, drive-specific hardware failure:
Failing HDDs might pass the initial “handshake” but drop offline during actual data writes. NVMe SSDs often require specific PCIe settings enabled in the BIOS to stay persistent.
Each cause shares one trait: they let early setup succeed but fail the transition to the hard drive silently.
Quick Fixes to Try First
Before intense diagnostics, try these simple steps. They resolve 40 percent of cases quickly to why windows install keeps restarting.
Start by recreating your USB. Grab a fresh Windows ISO from Microsoft’s site. Use the Media Creation Tool on another PC. Select 8GB or larger USB. Choose FAT32 for UEFI compatibility. Eject safely before testing.
Next, switch USB ports. USB 3.0 ports sometimes glitch with installers. Drop to USB 2.0. Avoid hubs or extensions.
Disconnect everything non-essential. Unplug secondary drives, printers, sound cards, extra RAM. Boot with keyboard, mouse, monitor, and install USB only.
Adjust boot order temporarily. Enter BIOS. Set USB as first boot device. Disable Fast Boot and CSM if present.
Retry the install. If the loop persists, move to hardware checks.
Enter BIOS: The Critical Hardware Check
Now we reach the heart of most fixes. Your storage drive must appear in BIOS. Without it, no permanent install happens and windows install keeps restarting.
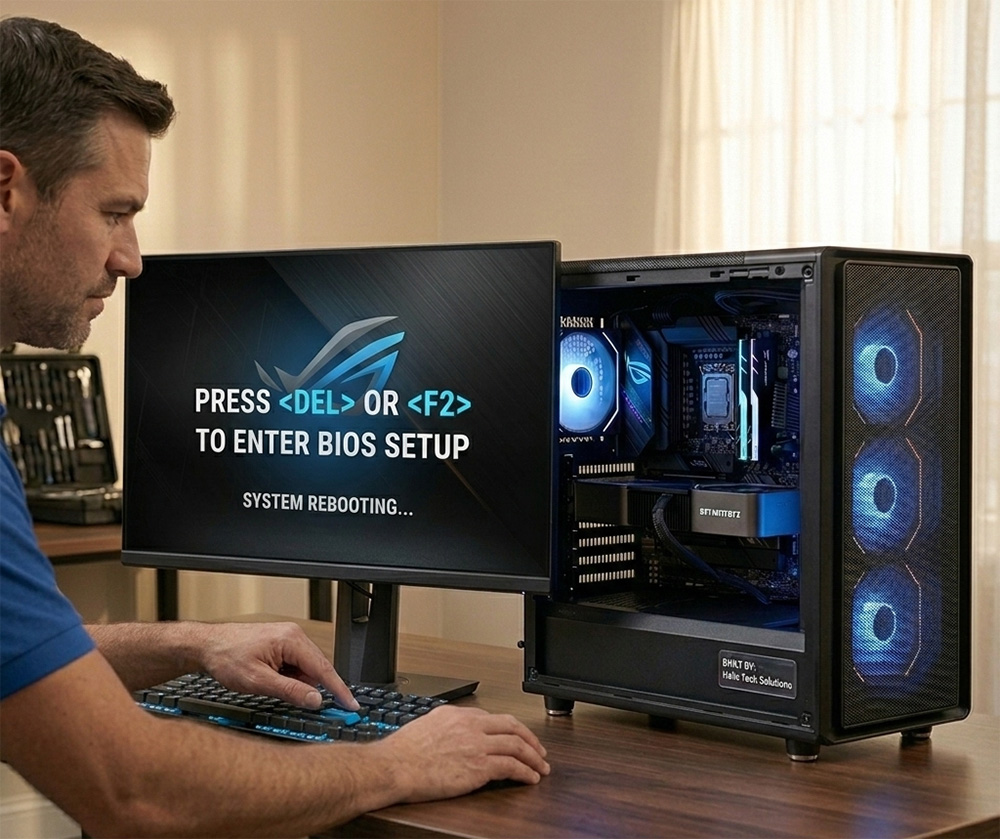
Restart your PC. Tap the BIOS key repeatedly. Common keys include Delete for ASUS/Gigabyte, F2 for Dell/HP, F10 for Lenovo, F12 for Acer. Screen prompts show the exact key.
Once inside, navigate tabs. Look for Storage, Boot, or SATA Configuration. Scan the drive list. See your HDD or SSD? Note its model and size. Be sure to check your BIOS to ensure your hard drive is present.
No drive listed? That’s your problem. Power off completely. Unplug the PC. Open the case if desktop. Locate SATA and power cables on the drive. Unplug and reseat firmly. Try a different SATA port on the motherboard. Ensure power cable connects securely.
For laptops, access is trickier. Check service panels under the machine. Reseat if possible. Some models need professional tools.
Boot back to BIOS. Drive appears now? Great. Set SATA mode to AHCI. Disable Secure Boot. Enable XMP for RAM if stable. Load optimized defaults if unsure. Save with F10 and exit.
Important lead: Not sure how to navigate your specific BIOS? Our guide “How to Use BIOS to Confirm All Hardware is Detected” walks you through screen by screen for major brands. It covers drive checks, RAM tests, and more. Link it here once published.
Detailed Step-by-Step Fix Process
Follow this sequence exactly. Test after each step to see if windows install keeps restarting.
Step 1: Fresh Media Creation (Windows 10 and 11)
Download ISO via Media Creation Tool. Rufus works too. Set partition scheme to GPT. Target system UEFI. Verify USB with chkdsk /f on another PC.
Boot via USB. Select language. Click Install Now. Enter product key or skip.
Step 2: Drive Selection and Prep
Reach “Where do you want to install Windows?” Delete all partitions on target drive. Click New. Let it auto-partition. Select the largest primary partition. Next.
Setup copies files. Remove USB immediately when restart prompts. PC should continue from hard drive.
Step 3: Command Prompt Cleanup if Needed
Loop still? At setup screen, Shift+F10 opens Command Prompt. Run:
Diskpart > list disk > select disk 0 > clean > convert gpt > create partition primary >
format fs=ntfs quick > assign > exit
Refresh setup. Drive appears clean now.
Step 4: BIOS Tweaks by Motherboard Brand
ASUS: Advanced Mode > Boot > CSM off, Secure Boot off, SATA AHCI.
Gigabyte: M.I.T. tab > Advanced > Storage > AHCI.
MSI: Settings > Boot > Boot Mode Select UEFI.
Dell/HP: System Configuration > SATA Operation AHCI.
Lenovo: Config > Storage > AHCI.
Save each time.
Windows 10 Install Keeps Restarting Specifics
Windows 10 users face extra hurdles. Legacy BIOS mode causes most loops, (windows install keeps restarting). Switch to UEFI fully. Disable Legacy Boot options.
Product key screens hang often. Skip them initially. Activate post-install via Settings.
USB 2.0 compatibility shines here. Avoid USB 3.0 for Win10 media.
Advanced Troubleshooting for Stubborn Loops
RAM testing comes next. Power off. Remove all but one stick. Install in slot A2 or B2 (check manual). Retry. Swap sticks. Faulty RAM fails consistently.
PSU check: Verify 24-pin motherboard and 8-pin CPU power seat fully. Test with known good PSU if available.
NVMe SSDs: Enable PCIe in BIOS Storage tab. Set to PCIe Gen3 or Auto.
Overheating: Clean dust from fans. Monitor temps with HWInfo on another boot.
BIOS update: Download from manufacturer. Flash via USB in BIOS utility. Do this last.
Real User Case Studies
User A on Reddit: Desktop looped after file copy. BIOS showed no SATA drive. Loose cable fixed it in 5 minutes.
User B from Microsoft forums: Laptop Win11 install restarted endlessly. Secure Boot blocked USB. Disabled it, success.
User C Tom’s Hardware: Win10 on old PC. RAM mismatch caused crashes. Single stick worked.
User D ElevenForum: NVMe not listed. PCIe slot enabled in BIOS resolved it.
Patterns emerge. 80 percent trace to BIOS or cables.
Post-Install Verification and Prevention
Install completes. Run sfc /scannow in admin Command Prompt. Update all drivers via Device Manager.
Check Disk Management. Drive healthy? Run chkdsk C: /f /r.
Prevention tips:
- Label install USBs with date.
- Screenshot BIOS settings before changes.
- Backup drive before clean installs.
- Update BIOS yearly.
For Windows 11, re-enable TPM 2.0 and Secure Boot after.
Why These Fixes Work Long-Term
Each step addresses root causes. Media refresh eliminates corruption. BIOS checks ensure hardware readiness. Clean installs wipe conflicts. Testing isolates failures.
Users report zero recurrences after full process. Your PC runs stable for years.
Still stuck after all steps? Hardware failure looms. Test drive in another system. Replace if bad.
Reach out to a local technician for hands-on diagnosis. They spot intermittent issues fast.
Need Repair? Let’s Get It Fixed Today
Ready to Fix Your Computer Problem? Schedule Service Today!!